This article provides information on documents in Appulate.
Overview
Appulate supports different document types and saves a lot of time and effort when filling these documents.
Documents are available on several Appulate pages, each type coming with a specific set of available actions.
You can set the privacy type for documents.
Pages with documents
Pages where documents are uploaded, stored, and edited, as well as available actions are listed in the table below.
| Tabs | Types of documents | Additional information |
| Forms page |
|
ACORD and Supplemental forms can be:
|
| Loss runs page |
|
You can:
|
| Quote request > Documents page |
|
You can:
|
| Policy > Policy documents section |
|
You can upload documents, send by email, edit or delete. |
| Policy > Documents page |
|
You can:
|
| Insured documents |
|
You can
|
Documents privacy
Appulate users can determine the privacy type of uploaded documents:
- in the company settings;
- in the Edit document dialog.
Some document types can have restricted access.
Note: By default, the documents uploaded on the Market Smart Q&A page are available to all companies in the submission chain. This applies even if the uploading company has its Document access set to My company only.
Settings page
The default privacy state of all uploaded documents is determined by the Document access setting on the Setup > Settings page.
The Settings page is only available to admin users.
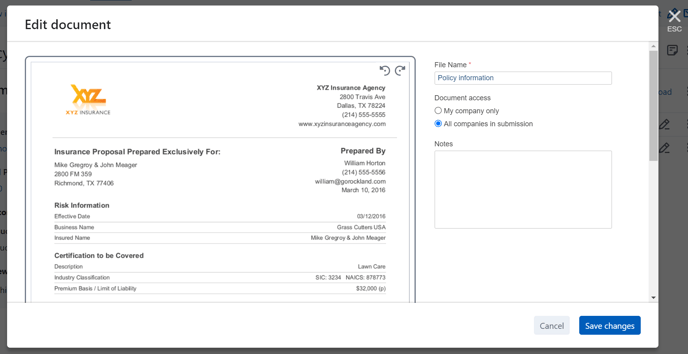
Edit document dialog
Each user uploading a document can decide if it will be available only to their company or all companies in the submission chain in the Edit document dialog. It opens right after you upload a document.
Note: This setting is only available to the users of the company who uploaded a document.
Document privacy options
Regardless of whether you're setting the document access on the Settings page or the Edit document dialog, two privacy options are available:
- My company only - Documents will be shared only between the users of the company that uploaded them. They will not be attached to the submission and emails to the market.
- All companies in submission - Documents will be shared between the users of the company that uploaded them, as well as with other companies in the submission chain.
Documents with restrictable access
Note: The sharing rules do not apply to the Insured documents page and appointment documents.
You can restrict access to the documents with the following types:
- Other;
- ExMod Sheet;
- Policy;
- Notice of Cancellation;
- Declaration Page;
- Resume/Bio;
- Statement of Values;
- Contract;
- SL-2;
- MVR;
- Vehicle Registration certificate;
- D-1;
- Quote;
- Email.
Interface and actions
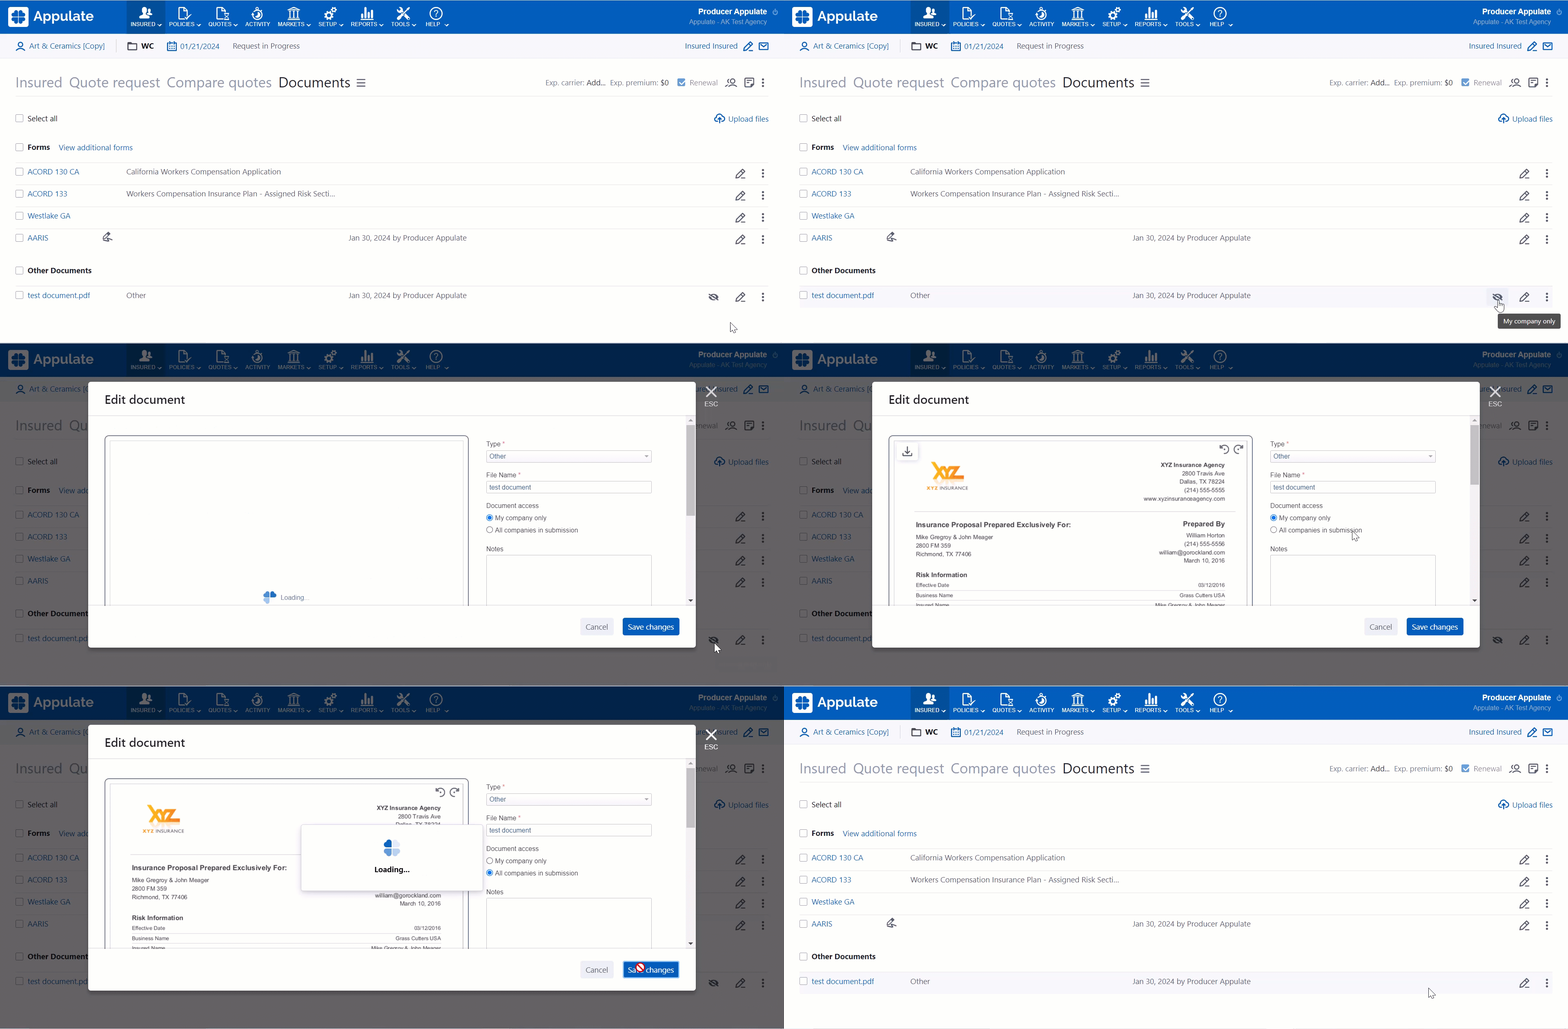
On the interface, documents with the My company only privacy type will be displayed with the icon ![]() :
:
Clicking the icon opens the Edit document dialog, where you can change the access type. This applies to:
- documents on the Documents page for quote requests and policies;
- Policy documents on the Policy page.
Note: Only the users of the company that uploaded the documents can change their visibility. If an ACORD, Supplemental or LossRun document type was changed, this document will be visible to everyone.
Notes
If a document has a note added to it, the Documents page will display it in a separate column.
You can add document notes in the Edit document dialog. It opens when you upload a document or click Edit in a document's row.

Moving documents
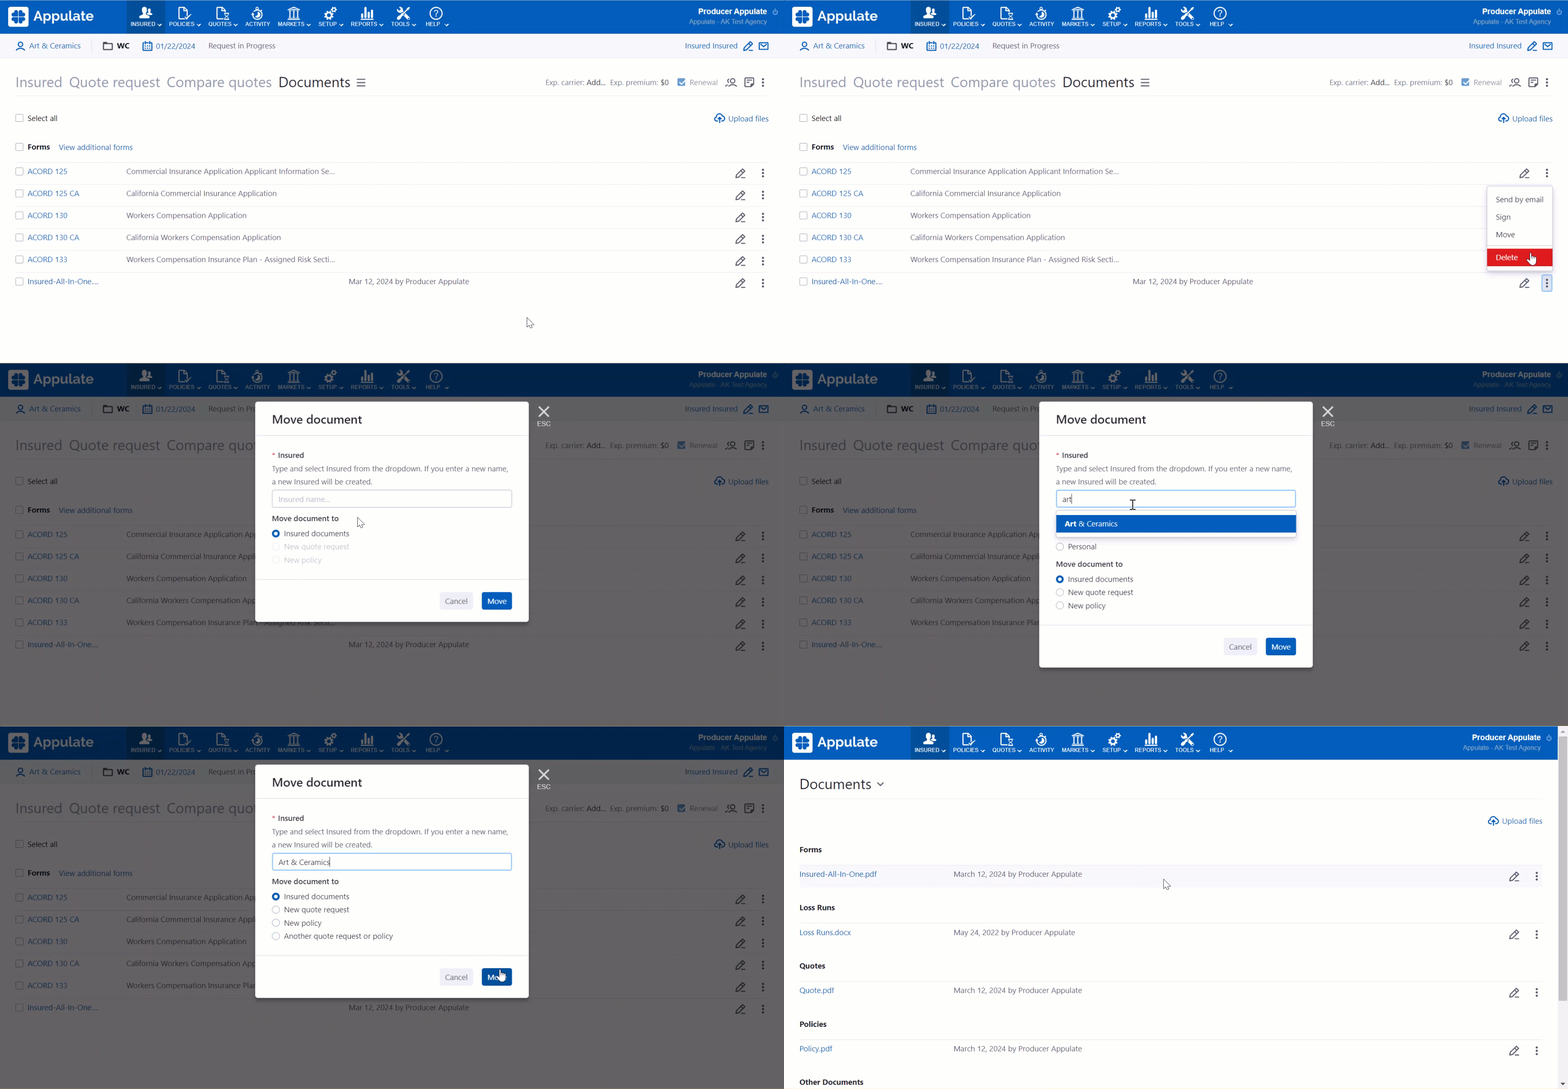
In Appulate, you can use the Move document dialog to transfer a document to another insured (both existing and new), quote request, or policy.
To open this dialog, click the Move button for the document you want to move on one of the following pages:
- Insured page > Insured documents
- Loss Runs
- Documents page for quote requests and policies
You can also move a document during Uplink.
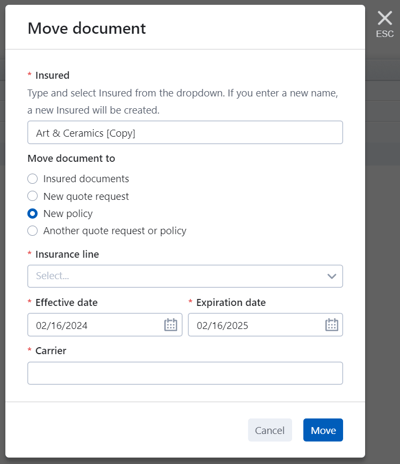
In the Move document dialog, you need to specify the insured and the page the document will be moved to:
-
Insured documents: The document will be moved to the Insured documents page of the specified insured.
-
New quote request: The document will be moved to the Documents page of a new quote request. You can create it in the dialog. Just fill in the required Insurance line, Effective date, and Expiration date questions.
-
New policy: The document will be moved to the Documents page of a new policy. You can create it in the dialog. Just fill in the required Insurance line, Effective date, Expiration date, and Carrier questions.
- Another quote request or policy: The document will be moved to the Documents page of an existing quote request or policy. You need to select it in the required Quote request or policy field. This option is only available when moving a document to an existing insured.
Note: If you're moving a loss run to an existing or new quote request, it will be available on both the Loss Runs and Documents pages. For policies, it will be available on the Documents page.
You can move a document to a new insured. Just type the new insured's name in the Insured field and select the Insured type.
.png?width=688&height=564&name=Settings%20(4).png)


