This short video will walk you through using LossRunner in Appulate.
This article provides information on Appulate's LossRunner functionality.
Overview
Appulate's LossRunner creates an easy and trackable way to request loss runs on behalf of current customers as well as prospects, complete with an electronic signature.
This functionality is available for both mono and package lines.
Loss Runner is now free for agents.
Loss Runs page
In Appulate, the Loss Runs page is used to store documents on the insured's claims made in previous years and to send loss run requests.
You can find loss runs on the Quote request > Loss Runs page and Documents page. However, the LossRunner functionality is not available on Documents page.
The Loss Runs page displays information in the Carrier, Year, Coverage (for package lines), and Policy number columns. The information is grouped by carriers.
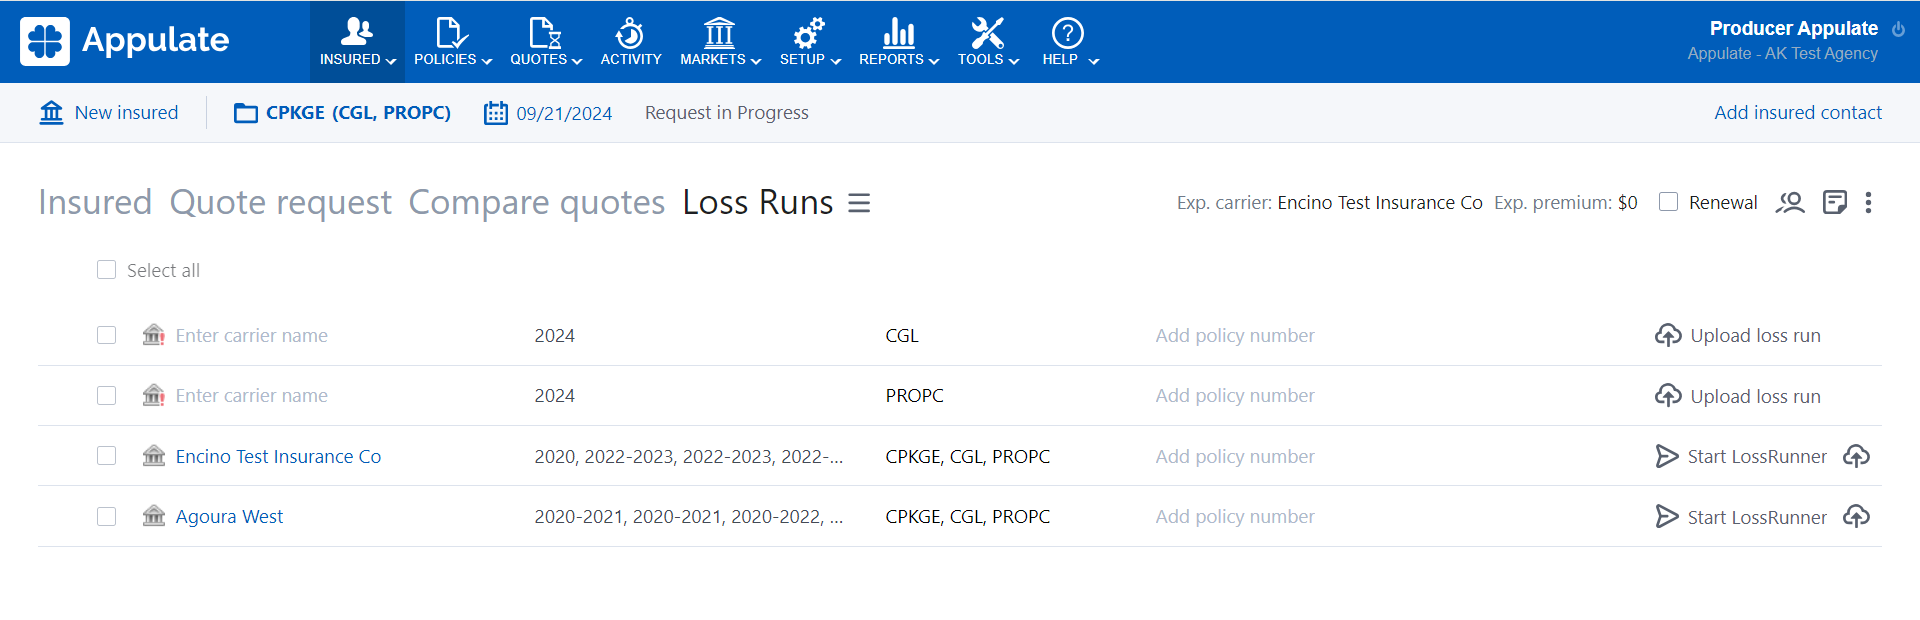
The insurance periods and other information displayed here come from the questionnaire > Insurance history. The section might have a different name (for example, Coverage history) depending on the insurance line.
How to add and edit carriers and policy numbers
The Loss Runs page allows you to add or edit an insurance period's Carrier and Policy number:
-
To add or edit a carrier, just click the Carrier field (Enter carrier name) and type in the name of the market.
-
To add or edit the policy number, click the Policy number field (Add policy number) and fill in the Edit policy number dialog.
However, you cannot add or edit insurance periods as a whole. This can only be done in the questionnaire > Insurance history.
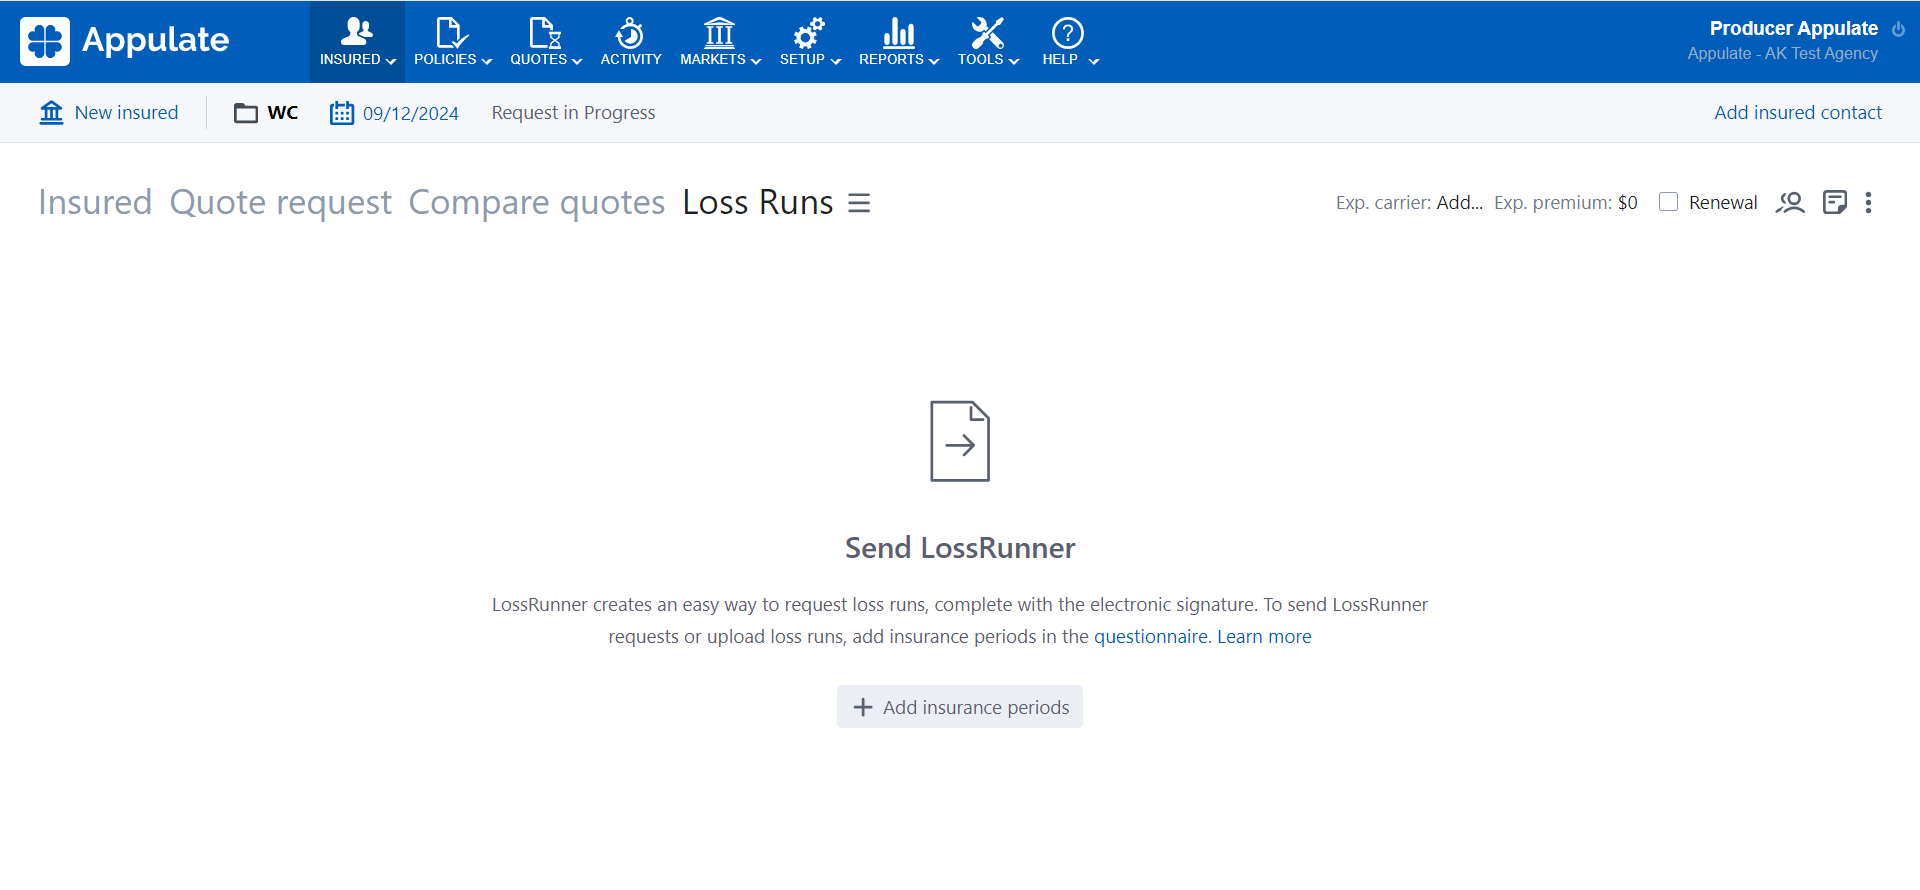
If the Loss Runs page is empty, this means you haven't added the Date business started and any insurance periods in the questionnaire. Clicking Add insurance periods will redirect you to the questionnaire. Fill in the Insurance history section there to start using LossRunner.
Note: During Uplink, market names can be misspelled or transferred incorrectly (absent from our database). In this case, the name of this market will be highlighted in red. To fix this issue, you need to click the market name and type in the correct name.
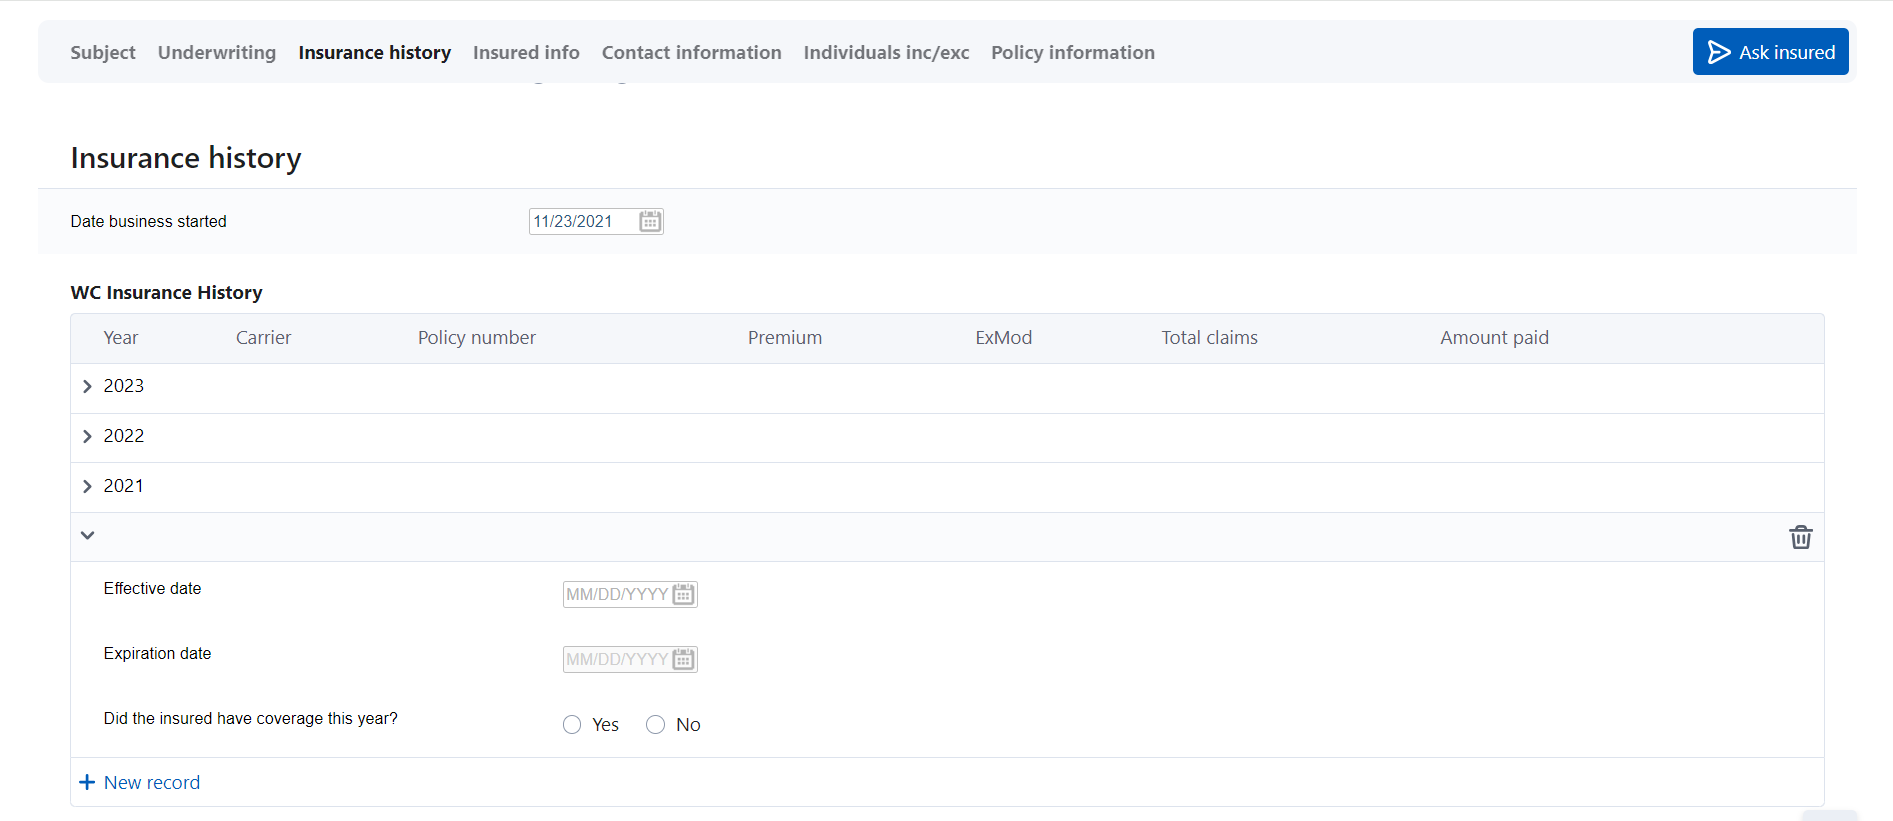
How to add and edit insurance history
You cannot add or edit insurance periods on the Loss Runs page. This can only be done in the questionnaire (the Insured tab) > Insurance history. The section might have a different name depending on the insurance line.
To add a new insurance period in the questionnaire, just click + New record and fill in the Effective date and the Expiration date. A row with this information will then appear on the Loss Runs page.
You can edit the existing insurance periods in the questionnaire, too.
Sending LossRunner request
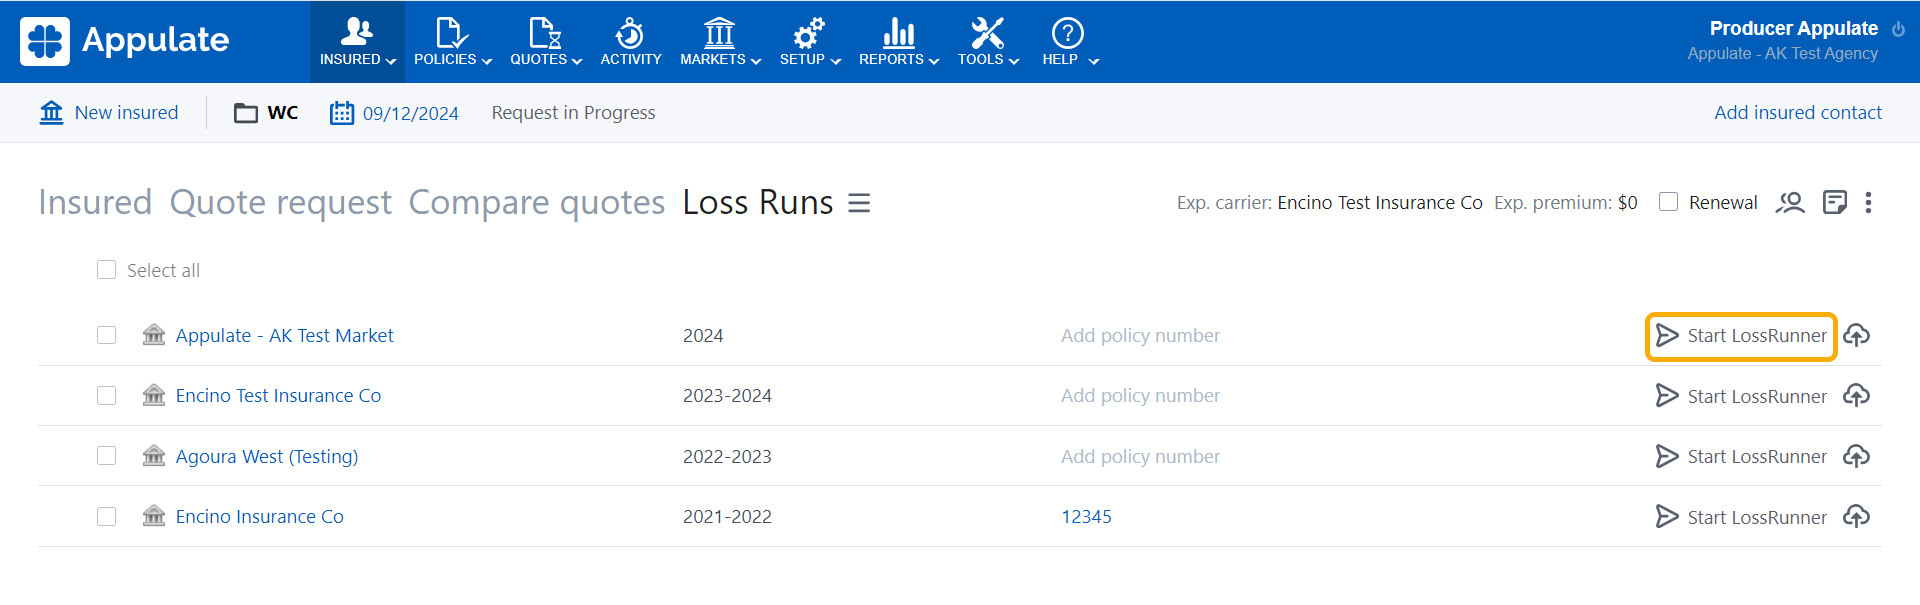
Once you've provided the Carrier for an insurance period, you can proceed with requesting loss runs from this market.
1. To send a LossRunner request, click the Start LossRunner button next to the market.
2. In the Send LossRunner to {Market} dialog, you can view and edit the following information.
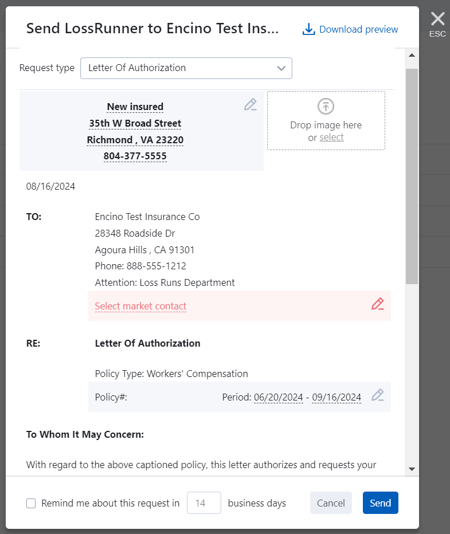
- Request type: Depending on the type, the content of the request changes. Once all information is entered, you can download a PDF file by clicking Download preview. The following types are available:
- Broker of Record Letter
- Letter of Authorization
- Agency Loss Run Request Letter
- Insured Loss Run Request Letter
- Client's logo (Insured for BoR and LoA) or agency's logo.
- The insured's information. It's entered in the Specify Insured dialog, which opens when you click the Edit button
 .
.
- The Address Lookup function is supported here: after you have typed several characters in the Address, City, State, or Zip box, a lookup list containing your possible choices will appear.
- Phone numbers are entered in the following format: 000-000-0000 Ext. 0000000. If you enter fewer digits than is required, a message will appear: "Incorrect phone number".

- Market contact. This field is required and not preselected. You can add the contact in the Market contact dialog, which appears when you click the Select market contact field.

Note: Appulate already has all the necessary contacts needed to request loss runs. This applies to email addresses and fax numbers of markets in our database.
- Policy number and period. Clicking this field opens the Edit policy number dialog.
- Agent contact. For Agency Loss Run Request Letters, either the requester or the Producer will be set as the signee.
- Insured contact on behalf of whom the request will be signed. Clicking the Add insured contact field will open the Insured contact dialog.

The following parameters are also available:
- "This authorization should remain in force for the period of [...] days starting from [...]" is available only for the Letter of Authorization requests. It indicates the number of days within which the client authorizes the agent to request their data. The default value is 14. The maximum is 360. This value can be changed in the request.
- "Remind me about this request in [...] business days" sets the number of business days after which the user will be reminded to sign the document or respond to the request (depending on its status). Whether it is needed, as well as the number of days after which it will be sent, is specified on the Settings page > Email subscription. The default value is 14. The maximum is 360. Apart from the Settings page, this value can be changed in the request itself. 0 will turn the reminder emails off.
Note: Fields with invalid values are highlighted in red. An error message at the bottom of the dialog indicates and links to the fields that need to be changed.
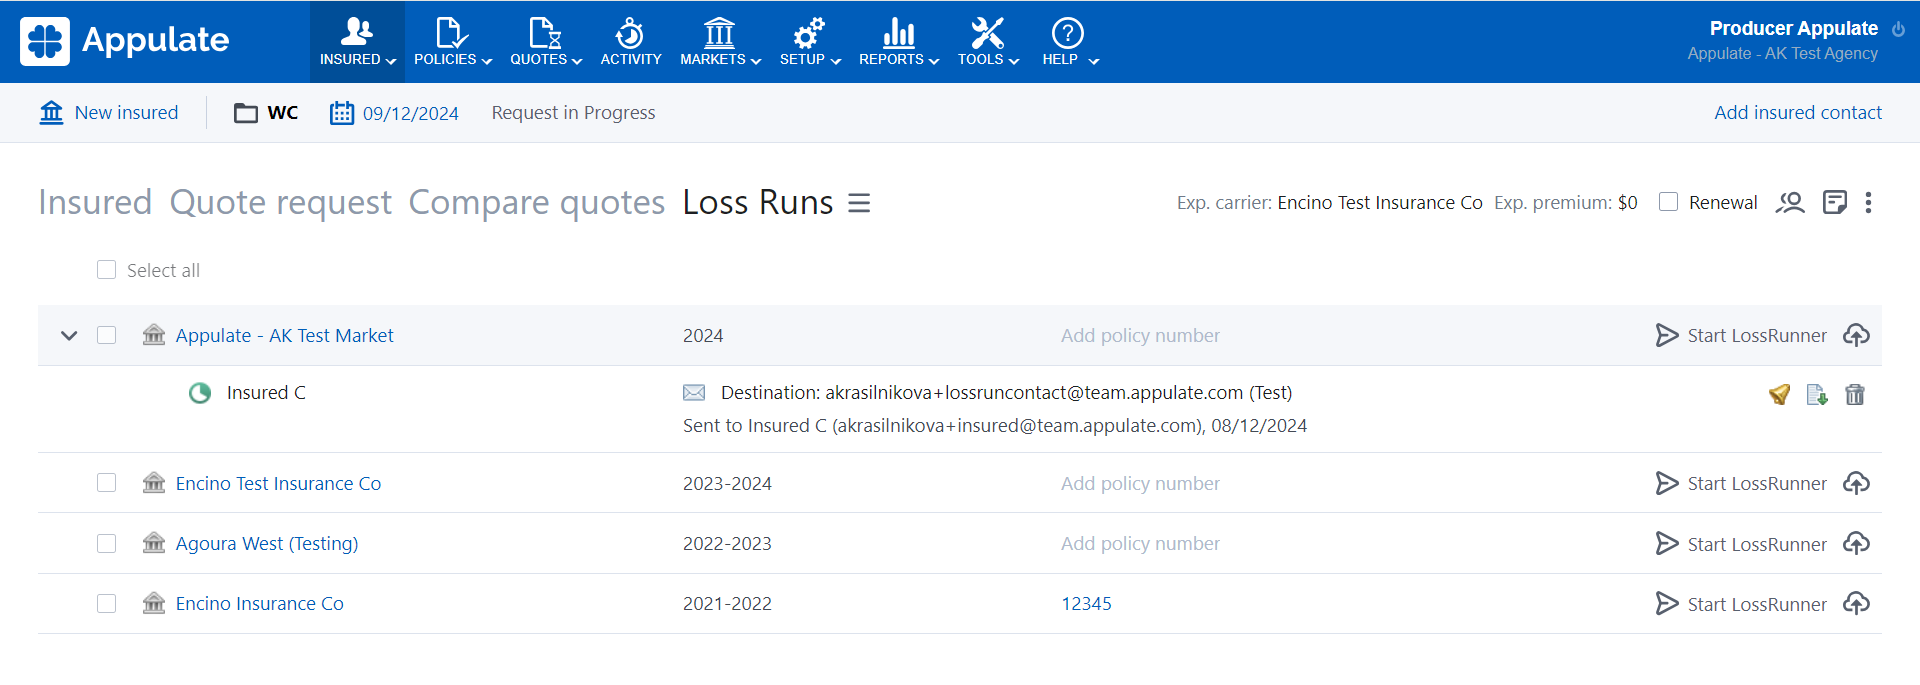
3. Once the LossRunner request is sent, it will appear on the page with new actions and statuses.
- Remind to sign
 : Sends a reminder to the signer via the eSignature service.
 - Download
 : Downloads the loss run request document to your computer.
 - Cancel
 : Cancels the request.
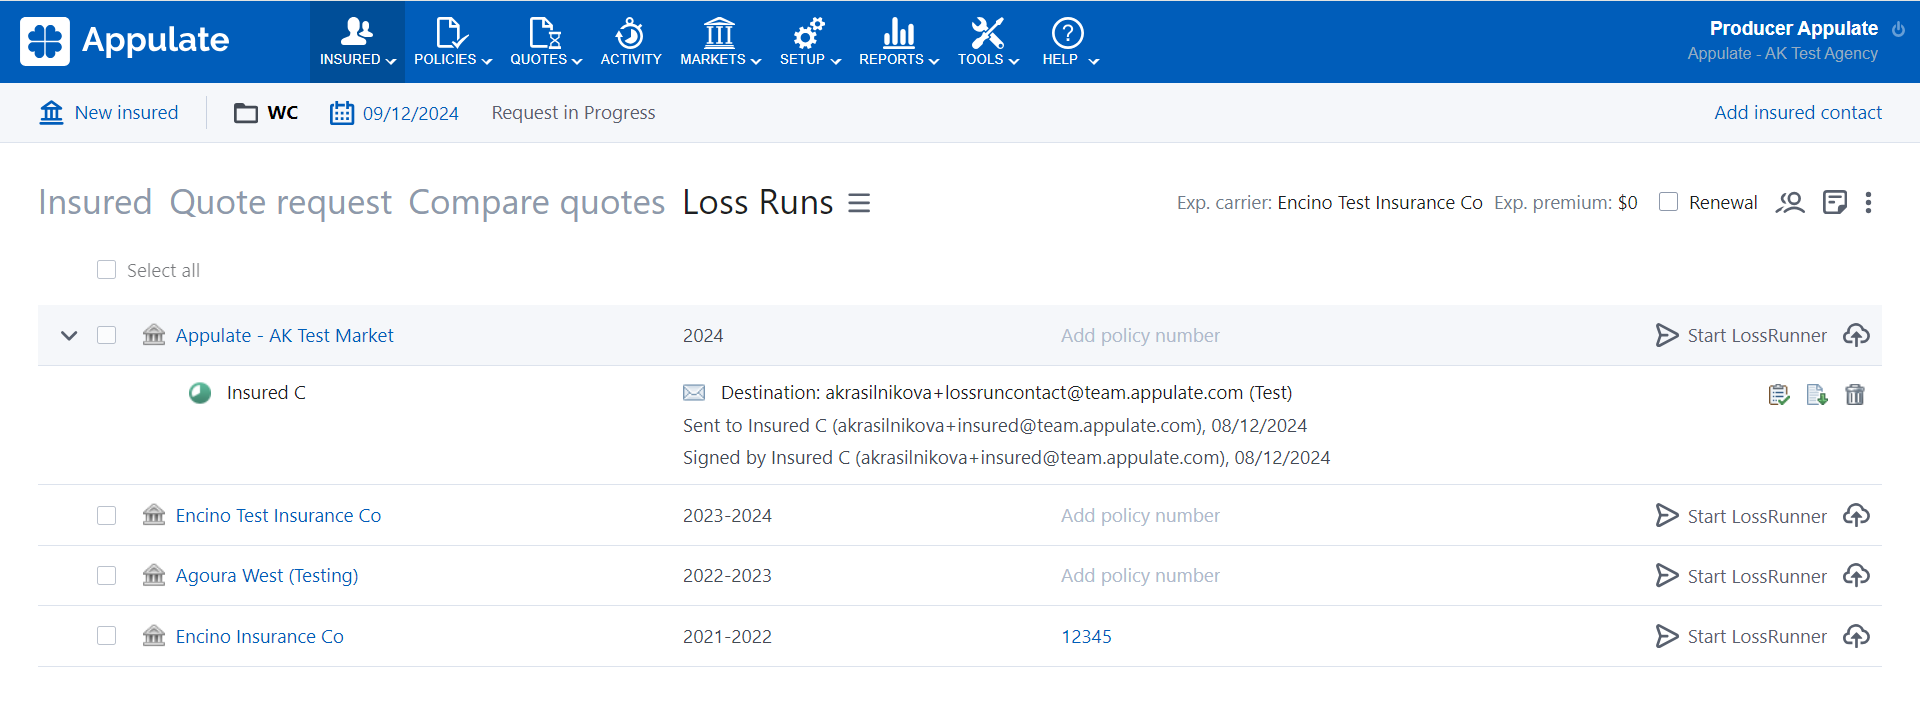
Note: You can see the status of your loss run request under it:
- Sent to Insured > Signed by Insured
- Sent to Market > Signed by Market
All statuses are updated automatically through the eSignature service. You will also get notified by email once all recipients sign the request.
4. After the insured has signed the request, the information will be updated and the request will be sent to the carrier.
Once the request is sent to the carrier, the agent will get the "Loss Runs Request Sent Successfully" email with the "Loss Run Request Document" and "Signing log" attached.
Available actions:
- Signing log
 : Downloads the signing log document to your computer.
 - Resend Loss Run Request Letter To The Carrier
 : Sends a reminder to the carrier via the eSignature service.
 - Download : Downloads the loss run request document to your computer.
Note: Sometimes agents receive loss runs from carriers outside Appulate (by email, etc.). To finish the process in Appulate, you'll need to upload received loss runs by clicking Upload loss run ![]() or by dragging and dropping the file from your computer onto the relevant market's row.
or by dragging and dropping the file from your computer onto the relevant market's row.
Additional actions with loss runs
- Upload loss run: uploads loss runs for the market, or, if a market is not specified, opens the Select market dialog. Files can also be uploaded using the drag & drop option. The maximum file size is 20 MB.
- Edit
 : Opens the standard Document markup editor to edit a document.
 - Send by email: Opens the Send Email window, where you can specify the email addresses of recipients to send them a document.
- Move: Opens the Move document dialog, using which you can transfer a document to another insured, quote request, or policy.
- Delete: Deletes a document.
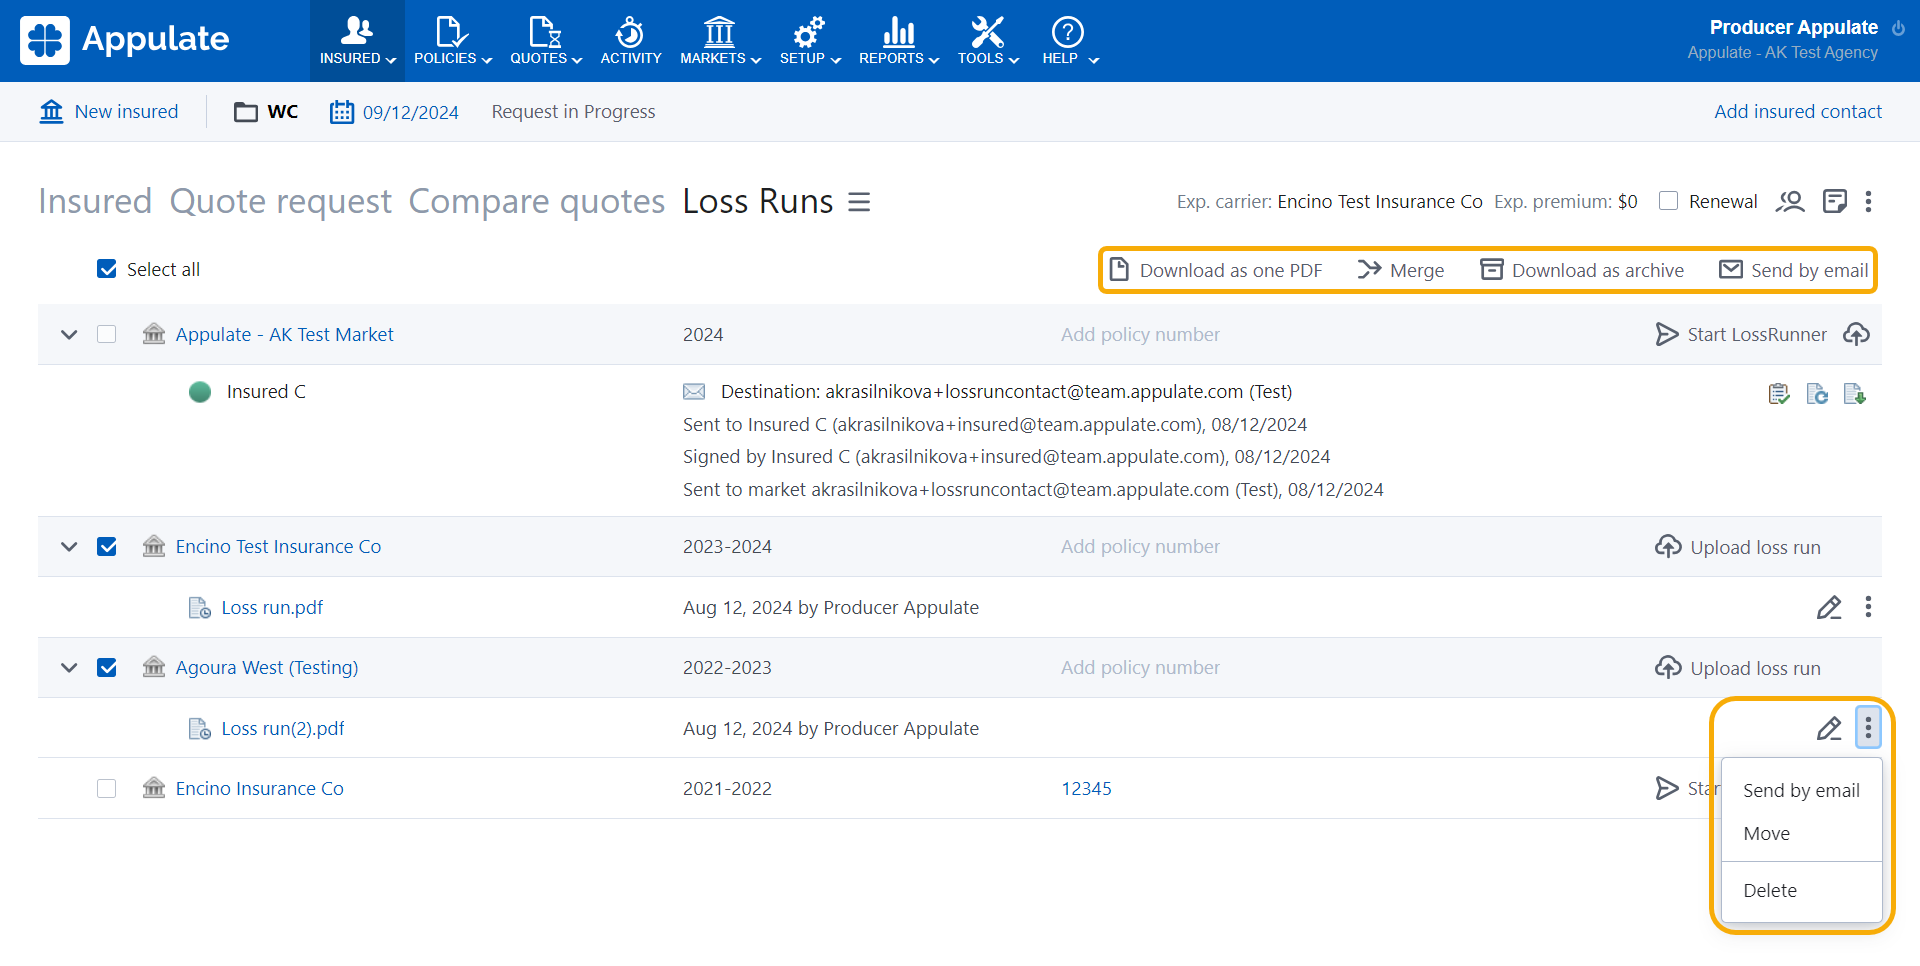
Note: When you select several carrier checkboxes or click Select all, another set of buttons appears on the bar above.
- Download as one PDF: downloads all selected PDF documents as one file. Documents in that file are displayed in the same order as on the tab.
- Merge: allows merging PDF files uploaded by the user. After merging, a new document with the type Other is opened in the Document markup editor. The user can merge from 2 to 10 files with a total size of up to 10 Mb. If one of the documents was private before merging, the newly created file will be private as well.
- Download as archive: downloads all selected documents as one ZIP file.
- Send by email: opens the Send Email window, where you can specify the email addresses of recipients to send them a document.
Note: If just one carrier's checkbox is selected, only the Download as archive and Send by email actions will be available.