An insured user is a person who is specified as an insured contact and joins Appulate by invitation from an agency user in charge of this insured's quote requests or policies.
The insured join Appulate to fill out forms, check or edit entered data, or simply track the status of their quote requests and policies. They do this on the Insured portal, which becomes available to them once they log in to Appulate.
Inviting an insured
To invite an insured, follow these steps:
1. Open the insured's Contacts page and click Add New.
Note: You can also add an insured contact when sending a request to fill out a form or a questionnaire. The contact you enter in the Add New Insured Contact dialog will appear on the Contacts page. You can then invite the insured by clicking Invite.
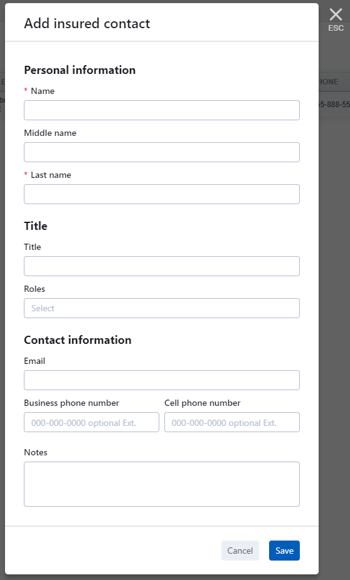
2. In the Add insured contact dialog, fill in the information and click Save. The Name and Last name fields are required.

3. The insured contact will appear in a new row on the Contacts page. You then need to click ![]() Invite in the last column to invite this insured contact to Appulate.
Invite in the last column to invite this insured contact to Appulate.
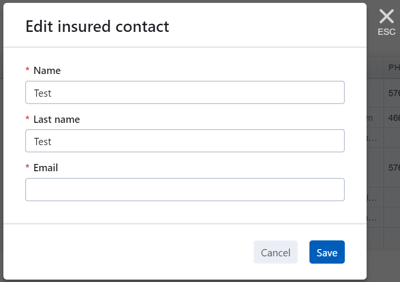
If you haven't indicated the insured's email in the previous step, clicking Invite will open the Edit insured contact dialog. It will only contain the required Name, Last name, and Email fields.

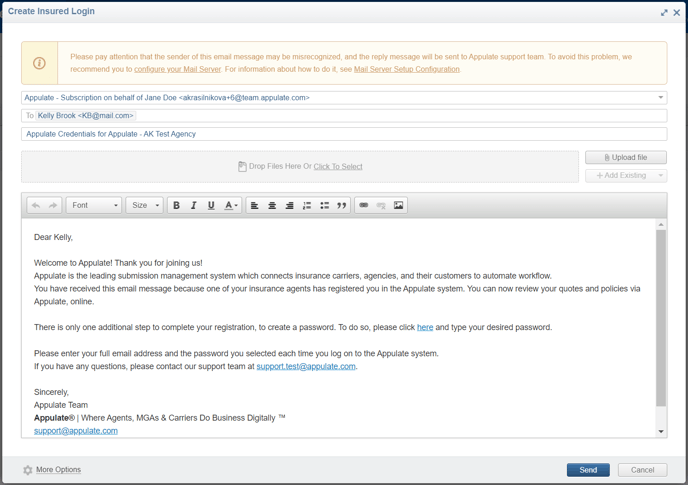
4. Clicking Invite opens the Create Insured Login window.
The insured's email is indicated in the To (recipient) field. The email's body contains login instructions and a link to create a password.
Note: If an insured user with this email is already registered in the system, when they are re-invited the email link will trigger an auto-login (even if another user has been logged in in this browser).
If the agent left the Quote request or Policy page open when re-inviting the existing insured user, the link will redirect the user to this quote request or policy.
5. After receiving the email, the insured needs to create a password via the provided link.
They can then log in to the system using their email address as their username. They will be redirected to the Insured portal.


